

If you already use Twitter, I won’t bore you with the benefits. If you don’t use Twitter, you should look into it. In my opinion, it’s unlike any other social network out there, and there is some real benefit to using it. I use it mainly for two reasons: 1) it’s a great way to disseminate good information to a lot of people, and 2) it’s a great way to follow the things that I really care about.
But this post isn’t about what Twitter is and how to use it. It’s about Mountain Lion’s Twitter integration, and how it can benefit you. First, let’s set up your Twitter account in Mountain Lion. To do this, we will open System Preferences then click on the “Mail, Contacts & Calendars” button. On the next screen, click on the Twitter logo on the right side to add your Twitter account.
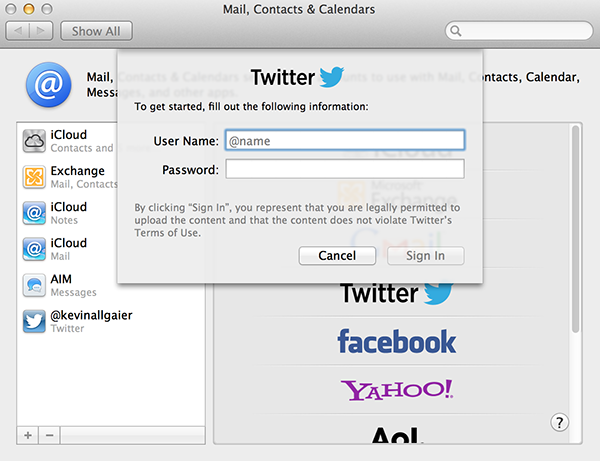
Once you have entered your username (handle) and password, click “Sign in” and you’re done!
Now that you’ve integrated Twitter with Mountain Lion, it’s time to use it. There are lots of different ways to use this. I will give you two:
1) Via Safari. Let’s say you find this really great site that you want to share with your Twitter followers. All you have to do is click on the Share button in Safari, and choose “Twitter”:
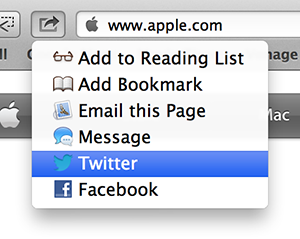
This will open a new pop-up window inside of Safari where you can add a short comment, then post to your Twitter feed.
2) Quick posting from Notifications Center. Swipe to engage Notification Center (or click on the Notifications Center icon in the top right corner of your screen), and you’ll see a Twitter post field at the top. Enter your text and press <enter>. Done.

I know this isn’t exactly rocket science, but integrating Twitter into Mountain Lion saves me a few seconds each time I post, and those seconds add up very quickly throughout the course of a day, week, month and year.


